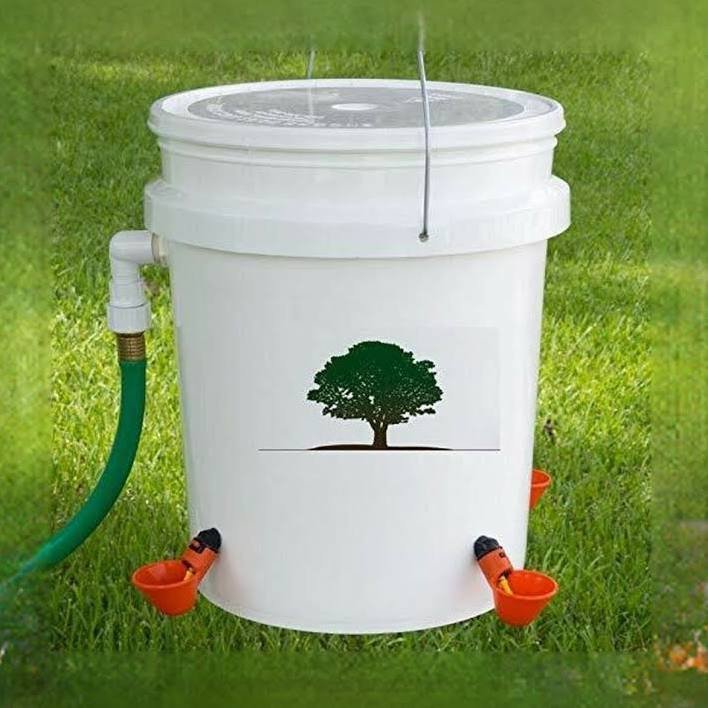
Ensuring your chickens have a constant supply of fresh water is vital for their health and well-being. In this guide, we’ll walk you through the steps to create a DIY 5-gallon chicken waterer. This project is simple to assemble and will provide your feathered friends with a reliable water source, making your chicken-keeping experience smoother and more convenient.
Materials Needed
Before you begin, gather the following materials:
- 5-gallon food-grade plastic container with lid
- Chicken waterer nipples (3-4)
- Drill with appropriate drill bits
- Silicone sealant
- Water container hanging system (hooks, chains, or rope)
- Water
Step-by-Step Instructions
Follow these straightforward instructions to construct your DIY 5-gallon chicken waterer:
Step 1: Prepare the Water Container Start by thoroughly cleaning the 5-gallon plastic container with mild detergent and water. Ensure it is food-grade and free from any harmful chemicals. Once clean and dry, place the lid securely on the container.
Step 2: Mark and Drill Holes Using a marker or pencil, mark the spots on the lower side of the container where you want to install the chicken waterer nipples. Aim to place them approximately 2-3 inches from the bottom for easy access by your chickens. Then, select a drill bit size that matches the diameter of the waterer nipples. Carefully drill holes at the marked spots, ensuring they are clean and smooth.
Step 3: Install the Waterer Nipples Apply a small amount of silicone sealant around the threaded portion of each chicken waterer nipple. Insert the nipples into the drilled holes, twisting them gently until they fit snugly. Wipe off any excess sealant.
Step 4: Test for Leaks Fill the container with water and check for any leaks around the waterer nipples. Tighten the nipples further or apply additional sealant if necessary to prevent leaks. Allow the sealant to dry completely before proceeding.
Step 5: Hang the Waterer Choose a suitable location within your chicken coop or run to hang the waterer. Install hooks, chains, or rope securely to suspend the waterer at a height that is easily accessible for your chickens. Ensure the waterer is stable and level once hung to prevent spills.
Step 6: Fill and Maintain the Waterer Fill the container with fresh water, ensuring it reaches the desired level without overflowing. Regularly monitor the water level and refill as needed to keep your chickens hydrated throughout the day. Additionally, clean the waterer regularly to prevent algae or contaminants from building up.
By building a DIY 5-gallon chicken waterer, you’re providing your flock with a reliable and convenient water source. Follow these steps, and enjoy the peace of mind knowing your chickens always have access to clean water.
Check out Weaver Family Farms for more tips on keeping your chickens hydrated!
Discover how to prevent your chickens’ water from freezing with Weaver Family Farms’ helpful guide!