If you’ve ever raised chickens, you know one thing pretty quickly. No matter how nice your coop is, your chickens would much rather be outside scratching through the grass, chasing bugs, taking dust baths, and exploring.
For a long time, I wanted to give ours a lot more room than they had. They were perfectly safe where they were, but every time I’d walk out to feed them, I kept thinking there had to be a better setup.
At the same time, I wasn’t interested in letting them completely free range all day.
We have hawks.
We have raccoons.
We’ve got coyotes that you can hear at night.
There are stray dogs every once in a while.
After losing enough sleep wondering if something would get into the pen overnight, I decided it was finally time to build the chicken run I’d been picturing in my head for months.
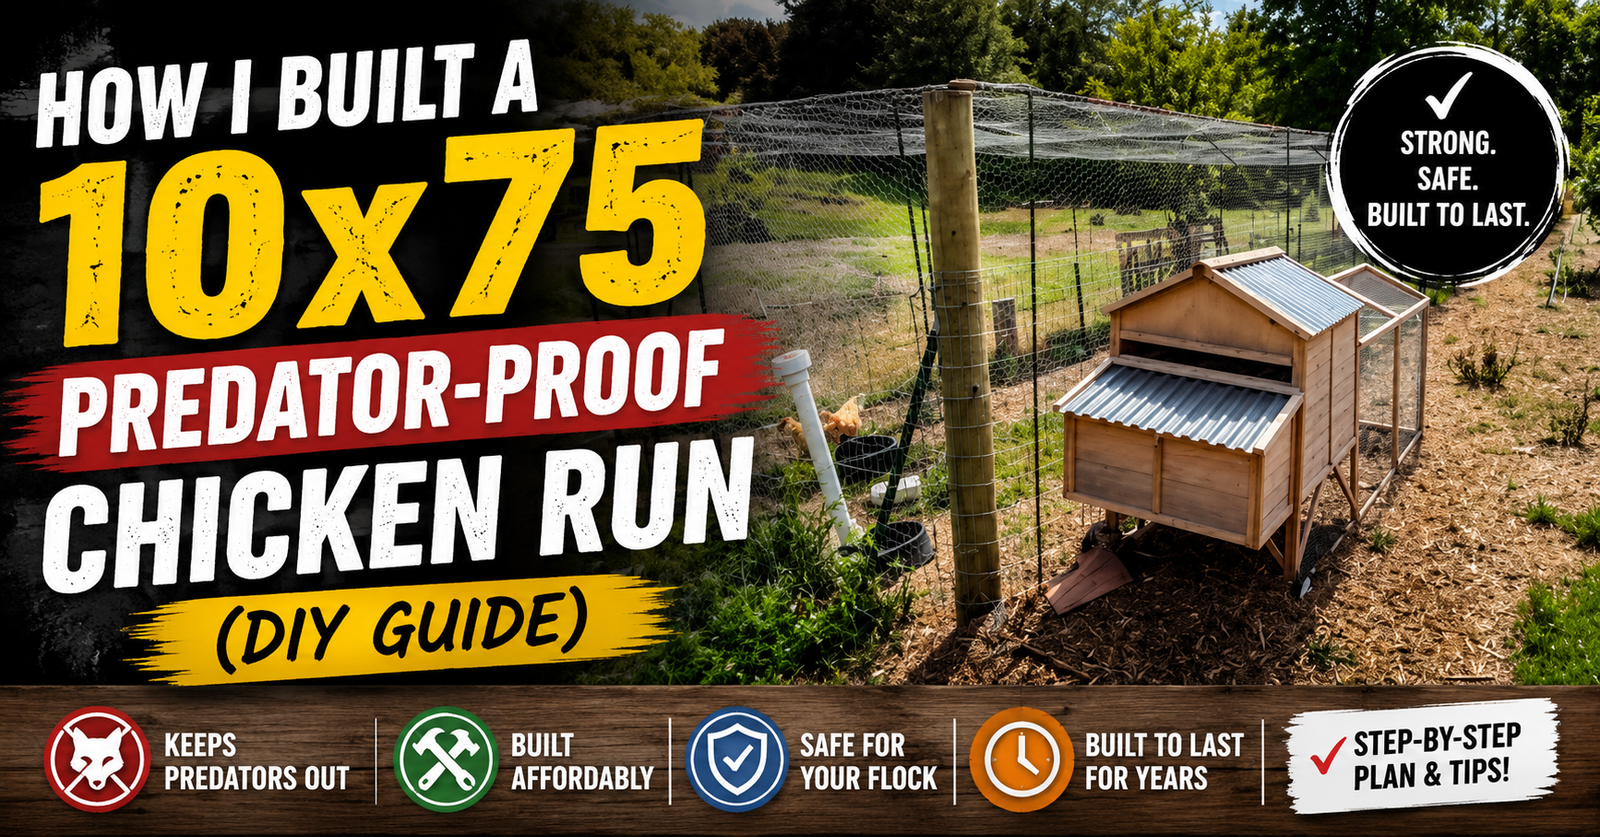
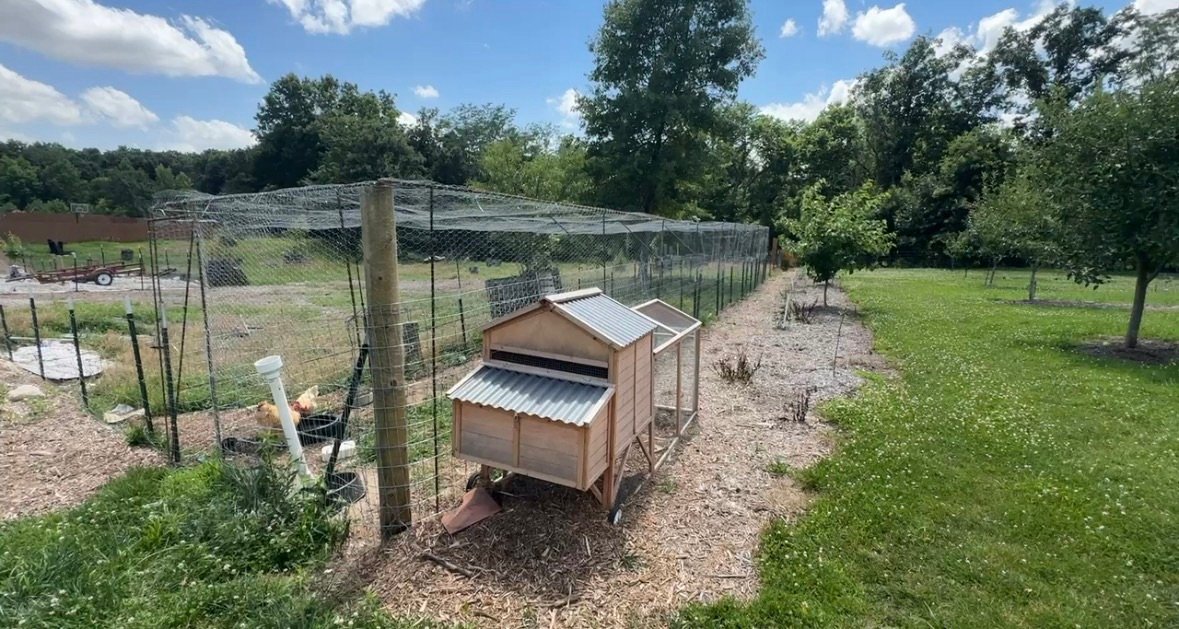
The end result was a covered walk-in chicken run that’s roughly 10 feet wide, 75 feet long, and about 7 feet tall.
Instead of buying one, I built the whole thing myself using T-posts, rebar, heavy woven wire, and a welder.

It wasn’t a weekend project either.
I worked on it whenever I had time over the course of about two months while keeping up with everything else happening here on our small family farm in Missouri.
Looking back now, I’d build it again in a heartbeat.
If you’re planning your own DIY chicken run, hopefully my project gives you some ideas, saves you a few headaches, and helps you build something that’ll last for years.
Don’t forget to watch the full build video in this post. It shows the entire project from start to finish and gives you a much better look than pictures alone ever could.
Why I Wanted a Bigger Chicken Run
I think one of the biggest mistakes people make is building the smallest chicken run they think they can get away with.
I’ve learned that’s almost always something you’ll wish you’d done differently later.
Chickens use every bit of space you give them.
The more room they have, the more natural they act.
Instead of standing around waiting for feed, they spend the day scratching through leaves, hunting insects, chasing each other around, dust bathing, and just being busy.
That’s exactly what I wanted.
My goal wasn’t just keeping chickens alive.
I wanted them to enjoy being chickens.
That’s one of the reasons I’ve enjoyed raising them so much over the years. They really do become part of daily life around the farm, and they’re one of the many reasons I enjoy homesteading. If you’re thinking about adding chickens to your own place, I shared even more reasons in my article about how chickens can make your homestead more sustainable.
Why I Built It Instead of Buying One
I looked at a lot of commercial chicken runs before I started building.
Honestly, I couldn’t find one that checked all the boxes.
Most of them were much smaller than I wanted.
Some looked flimsy.
Others cost several thousand dollars, and I’d still end up wishing they were bigger.
Since I already had a welder and enjoy building things around the farm, it just made more sense to build exactly what I wanted.
I’ve always liked making projects fit our farm instead of forcing our farm to fit something someone else designed.
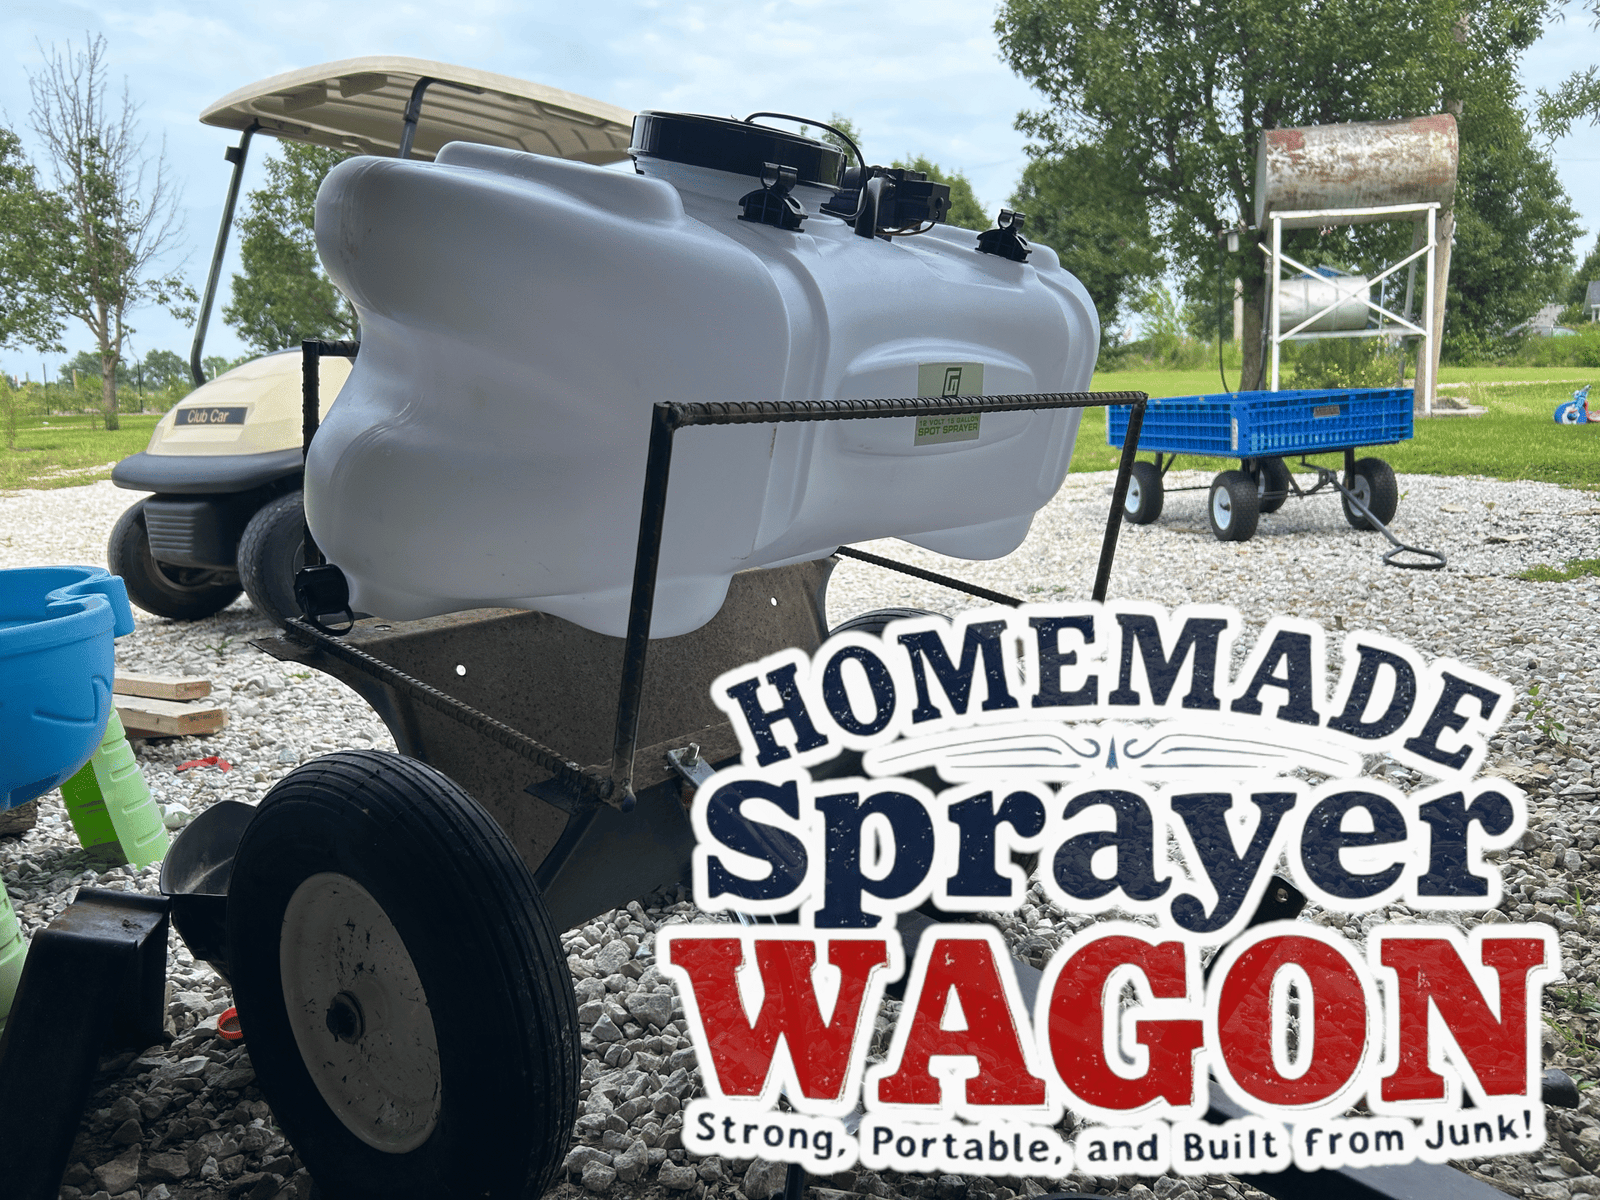
That’s been true whether I was building a custom utility bed for our Club Car golf cart or putting together equipment for spraying around the property.
This chicken run became another one of those projects.
Planning the Size
Before I bought the first piece of material, I spent quite a while thinking about the layout.
I finally settled on roughly 10 feet by 75 feet.
That gave the chickens a tremendous amount of room without taking over the entire yard.
I also wanted enough height that I could comfortably walk inside.
That may sound like a small detail, but if you’re going to spend years cleaning, feeding, gathering eggs, or simply checking on your flock, you’ll appreciate not having to duck every time you go inside.
At around seven feet tall, I can walk through the entire enclosure comfortably.
It makes daily chores much easier.
Choosing the Right Spot
Location mattered just as much as the design.
I built the run beside our orchard where I already spend a lot of time working.
That means I naturally check on the chickens throughout the day without making extra trips.
They get sunshine.
They get shade during parts of the day.
They have good drainage.
Everything just worked well with the layout of our farm.
Sometimes the simplest location ends up being the best one.

The Materials I Used
One thing I wanted was durability.
I wasn’t interested in building something I’d have to rebuild every few years.
The main materials included:
- Steel T-posts
- Rebar
- Heavy woven wire fencing
- Wire for the roof
- Metal zip ties
- Gate hinges and latch
- Welding supplies
Nothing fancy.
Nothing overly complicated.
Just materials I trusted to hold up over time.
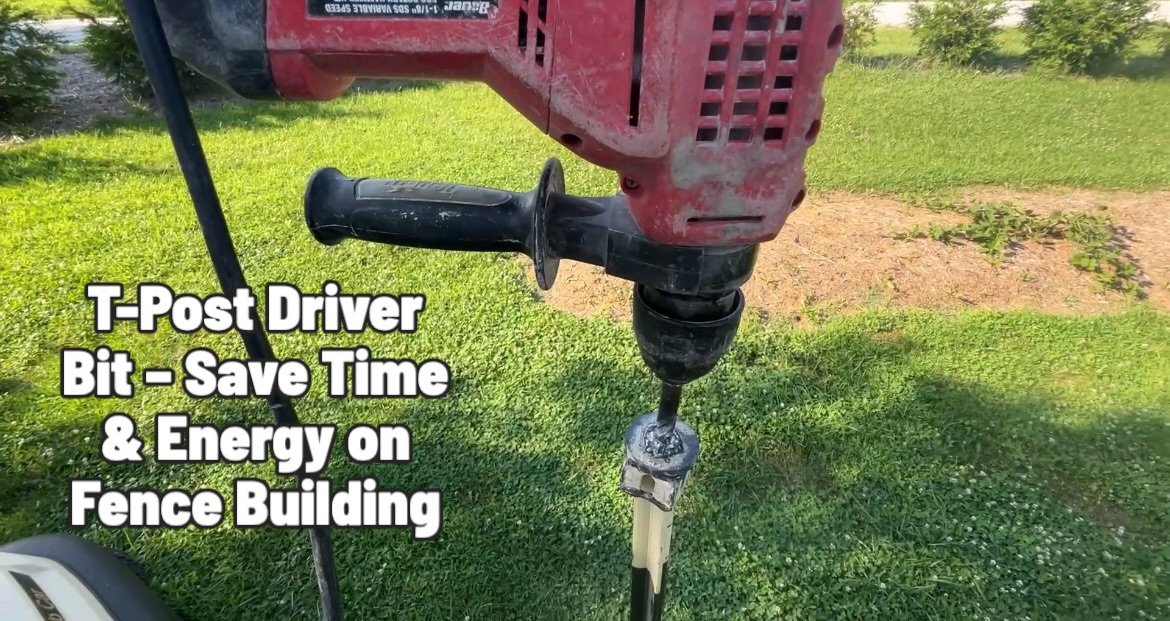
Why I Chose T-Posts
T-posts are hard to beat.
They’re affordable.
They’re easy to install.
They’re incredibly sturdy once they’re driven into the ground.
Most importantly, they gave me solid anchor points for welding the rest of the structure together.
I’ve driven enough fence posts over the years to know how much easier the job becomes with the right tools. That’s why I eventually wrote about the T-post driver attachment that saved me a lot of time on fencing projects. If you’re putting in dozens of posts, it’s worth looking into.
Building the Entire Frame From Rebar
This is probably the part that surprises people the most.
Instead of buying expensive square tubing or pipe, I built the framework almost entirely from rebar.
Some people probably wouldn’t even consider it.
I did.
And honestly, I’m glad I did.
Rebar is strong.
It’s relatively affordable.
It’s easy to weld together.
Once everything was tied into the T-posts, the entire structure became much more rigid than I expected.
Every section I welded made the whole run stronger.
By the time the framework was finished, it felt incredibly solid.

Covering the Top Was Never Optional
One decision I made very early was that this chicken run would have a roof.
Not a metal roof.
A wire roof.
I wanted predators out.
Around here, hawks are one of my biggest concerns.
I’ve watched them circle over our property more times than I can count.
Leaving the top open would’ve defeated one of the biggest reasons I built the run in the first place.
The roof also helps discourage climbing predators.
It gives me peace of mind knowing the chickens can stay outside without me constantly watching the sky.
If hawks are a problem where you live too, I recently read a really helpful article covering simple ways to protect chickens from hawks that shares several other ideas besides building a covered run.
Wrapping Everything in Woven Wire
Once the frame was finished, it was finally time to start attaching the fencing.
This definitely wasn’t the quickest part of the project.
Large rolls of woven wire aren’t exactly light.
It takes patience.
It takes stretching.
It takes repositioning.
But it’s worth taking your time.
Loose fencing never looks good, and it can create weak spots over the years.
I worked my way around the structure one section at a time until every side was enclosed.
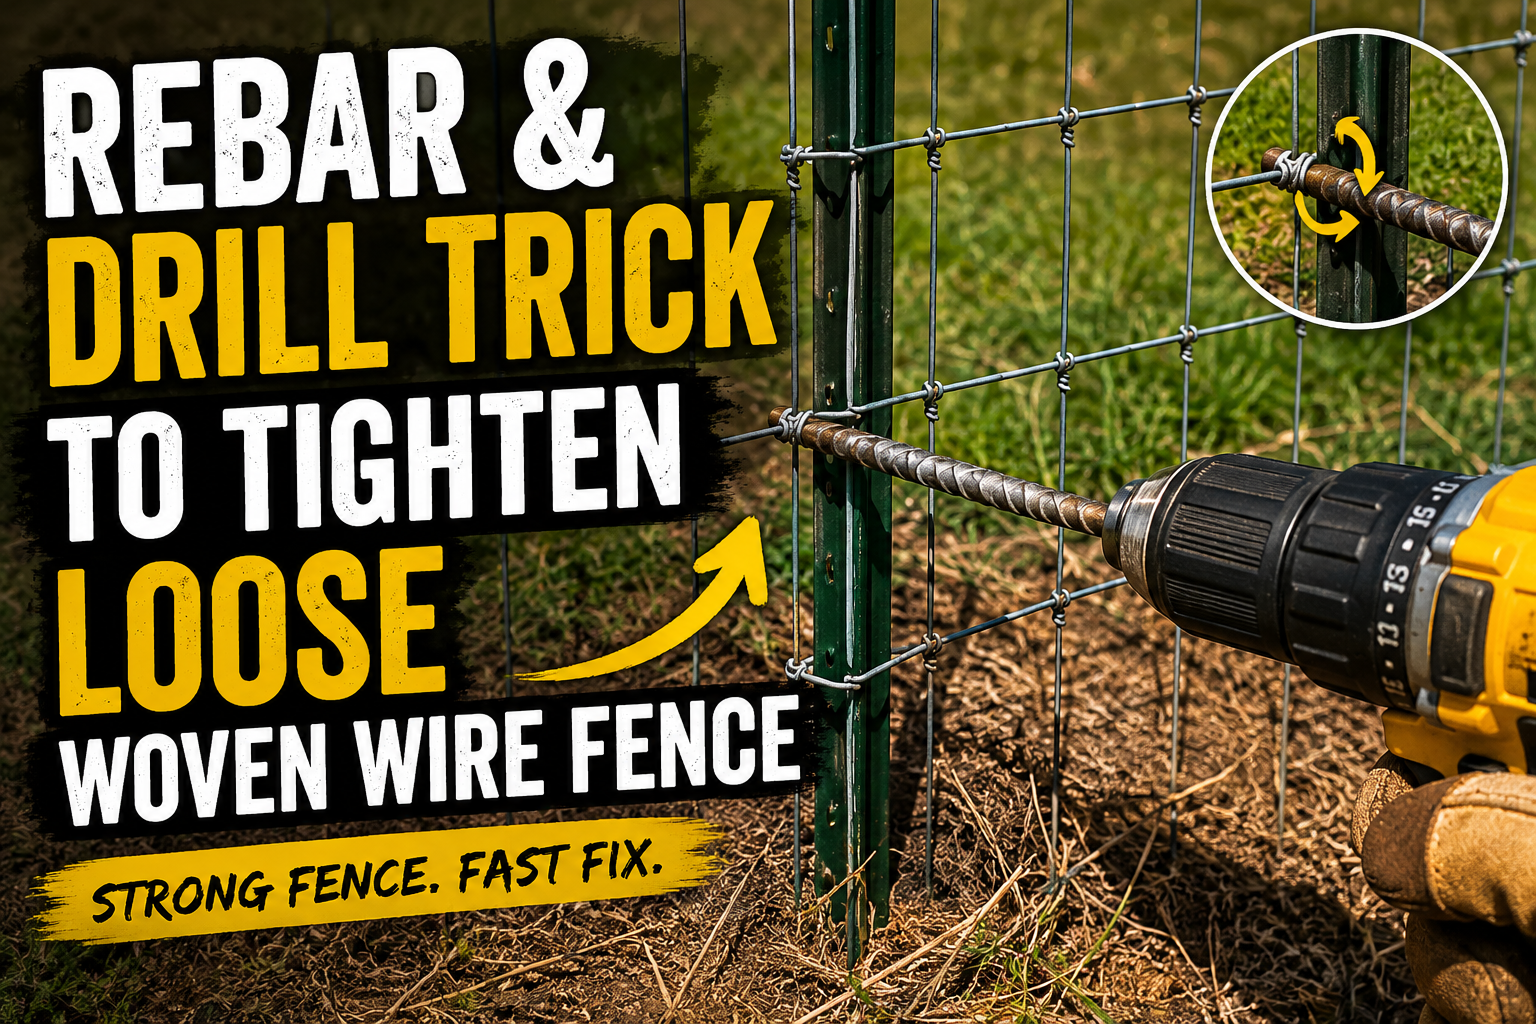
During another fencing project around the farm, I shared a simple rebar trick that makes tightening woven wire fencing much easier. It’s one of those little tricks that’s saved me a surprising amount of time.

Metal Zip Ties Worked Better Than I Expected
One thing that ended up working extremely well was using metal zip ties.
Instead of spending forever fastening every section of fencing, the metal ties made attaching the wire to the rebar fast, secure, and surprisingly clean looking.
Once everything was tightened down, the fencing stayed exactly where I wanted it.
Sometimes it’s the little things in a project that end up making the biggest difference.
Metal zip ties definitely fell into that category for me.
I Built My Own Gate Too
I didn’t want some flimsy gate that would eventually sag or twist.
Since I was already welding the frame together, I decided to build the gate from rebar too.
That way everything matched.
The gate ended up being incredibly solid while still opening and closing easily.
Getting the hinges lined up took a little patience, but once everything was adjusted, it worked exactly how I’d hoped.
A good gate may not seem exciting, but when you’re walking in and out every day carrying buckets, feed, or eggs, you’ll appreciate one that opens smoothly every single time.


Keeping the Water Clean Has Become Even More Important
One thing I noticed after giving the chickens so much more room is that they’re spending more time outside throughout the day. That also means they’re drinking more water, especially during the hottest part of our Missouri summers.
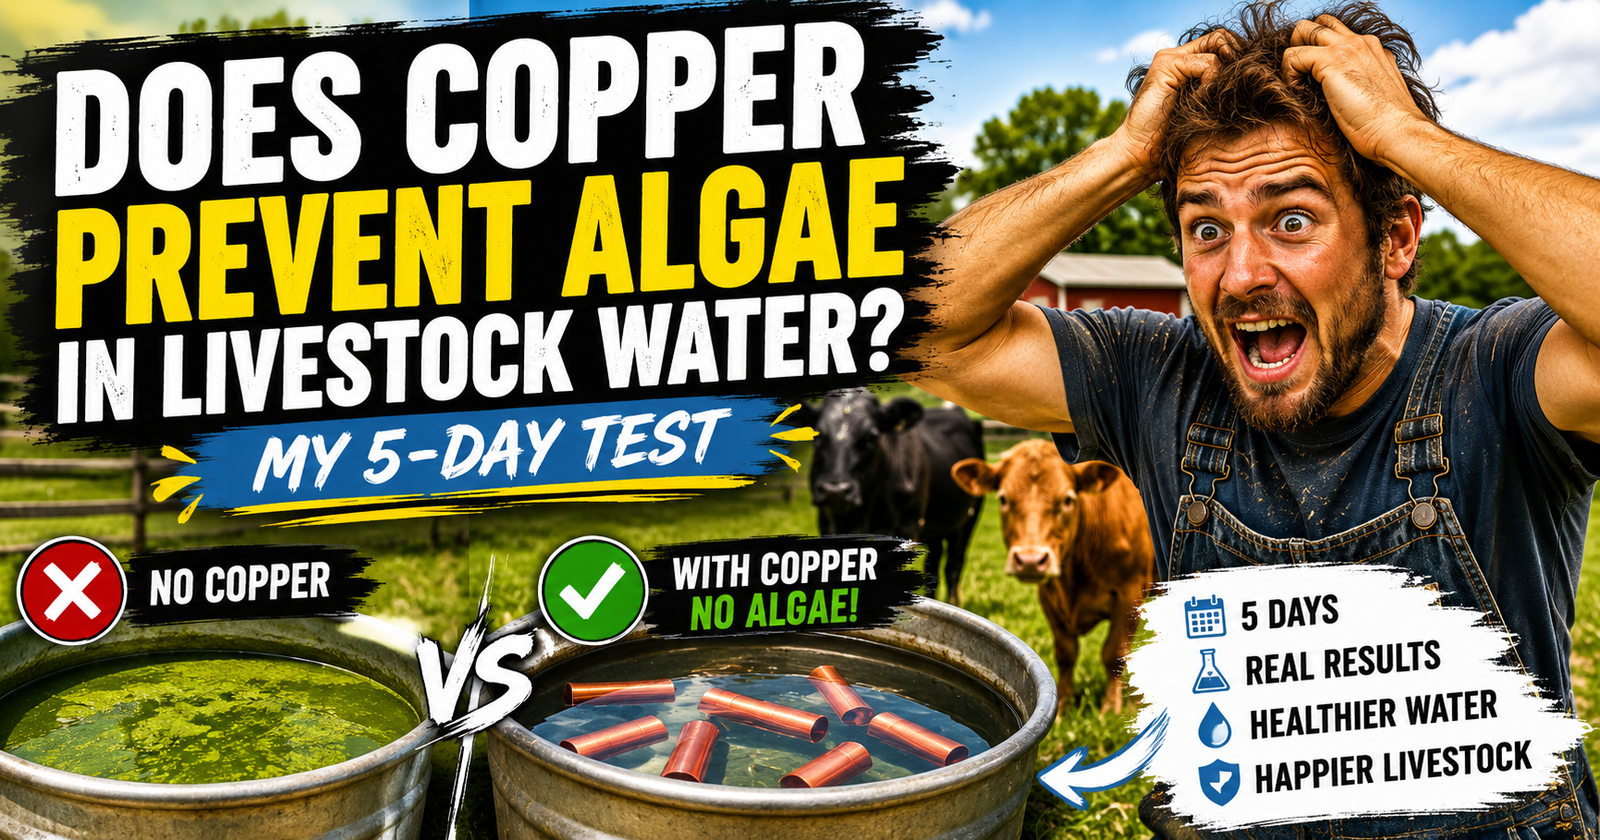
If you’ve raised chickens very long, you already know one of the biggest frustrations is algae. You can scrub a waterer until it’s spotless, and sometimes just a couple of days later it’s already starting to turn green again if it’s sitting out in the sun.
I recently decided to stop wondering whether the old copper pipe trick actually worked and tested it myself. I cleaned both our chicken waterer and our goat water tub, added pieces of copper tubing, and documented what happened over the next five days. The results honestly surprised me because the water stayed noticeably cleaner than I expected.
If algae is something you’re constantly fighting during the summer, you can read about the entire experiment in my 5-day test to see whether copper really helps prevent algae in livestock water. It’s not a replacement for dumping and cleaning your waterers regularly, but based on what I saw here on our farm, it’s definitely something I’ll continue using.
Connecting My Chicken Tractor to the New Run
One thing I really liked about this project was that I didn’t have to build an entirely new coop.
I already had a small chicken tractor that had been working well, so instead of starting from scratch, I simply incorporated it into the new setup.
After finishing the run, I positioned the chicken tractor right against one side of the fencing.
Then I cut an opening in the wire just large enough for the chickens to move freely between the coop and the run.
That gave them the best of both worlds.
The chicken tractor serves as their shelter during bad weather, gives them a comfortable place to roost at night, and provides nesting boxes for laying eggs. During the day, they have a huge enclosed area where they can spend their time scratching around and exploring.
It worked out even better than I had hoped.
If you’re building a large chicken run, don’t automatically assume you need to build a giant coop too. Sometimes using what you already have can save both time and money.

Watching the Chickens Enjoy Their New Space
I’ll be honest.
The best part wasn’t finishing the project.
The best part was opening the door for the first time.
Within minutes they were spread all over the run.
Some immediately started scratching through the grass.
Others found loose dirt for dust baths.
A few started chasing grasshoppers around like they had just discovered the greatest thing on earth.
Watching them actually use all that space made every hour I spent building worthwhile.
People sometimes ask how much room chickens really need.
The answer is simple.
They’ll use every square foot you give them.
Predator Protection Was One of My Biggest Goals
Living out in the country means predators are just part of life.
We’ve seen hawks.
We’ve seen raccoons.
Coyotes aren’t uncommon.
Even neighborhood dogs can cause problems if they get loose.
I wanted to build something where I didn’t have to constantly worry every time I heard the chickens making noise outside.
That’s why I enclosed the entire run, including the top.
Nothing is ever completely predator proof, but building with sturdy materials dramatically reduces the chances of something getting inside.
Having a fully enclosed run also lets me leave the chickens outside during the day without feeling like I have to keep one eye on the sky every few minutes.
Would I Build It This Way Again?
Absolutely.
In fact, if I ever build another chicken run, it’ll probably look very similar.
The rebar worked great.
The T-posts made a solid foundation.
The metal zip ties held everything tightly together.
The gate turned out sturdy.
Most importantly, the chickens have more room than they’ve ever had before.
That’s exactly what I was hoping for when I started this project.
Like any DIY build, there are always little things you might tweak after using it for a while, but I honestly wouldn’t change much.
How Long Did It Take?
This wasn’t a weekend project.
Between family, running our nursery, taking care of the farm, filming the project, and everything else that comes with owning a small farm, I worked on it whenever I had time.
From start to finish, it took about two months.
Could someone build one faster?
Definitely.
If you had all the materials ready and devoted every day to it, you could finish much sooner.
I wasn’t in a hurry.
I’d rather build something once and be happy with it than rush through it.
What Did It Cost?
I didn’t keep track of every receipt, but building it myself saved a tremendous amount compared to buying a commercial walk-in chicken enclosure this size.
The biggest expenses were:
- T-posts.
- Rebar.
- Heavy woven wire.
- Wire for covering the roof.
- Hinges and gate hardware.
- Metal zip ties.
- Welding supplies.
Even though material prices always seem to change, I still believe building it myself gave me a much larger and stronger enclosure for the money.
Daily Chores Are Easier Now
One thing I didn’t fully appreciate until after everything was finished was how much easier daily chores became.
Walking inside instead of squeezing through a tiny opening makes feeding, cleaning, and collecting eggs much simpler.
The chickens are calmer because they aren’t crowded.
There’s room to add feeders and waterers without everything feeling cramped.
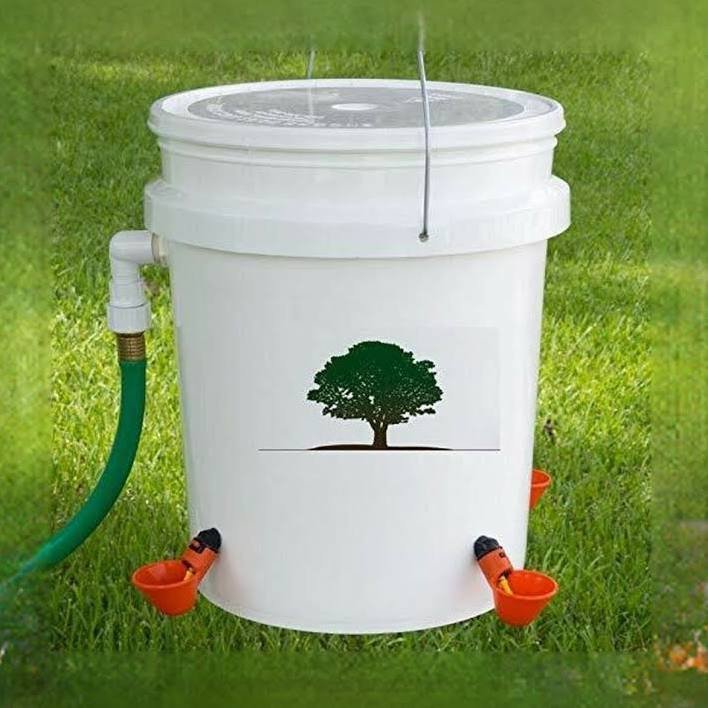
Speaking of water, keeping clean water available every day is one of the most important parts of raising healthy chickens. If you’re looking for ideas that save time, I put together another guide showing my DIY 5-gallon chicken waterer that’s worked well around our farm.
During the winter months, I also rely on the tips I shared in how I keep our chickens’ water from freezing because carrying frozen water buckets gets old in a hurry.
Giving Chickens More Space Has Been Worth Every Minute
One unexpected benefit has been watching how much more active the flock is.
Instead of pacing around a small pen, they’re constantly moving.
They’re scratching.
They’re hunting insects.
They’re dust bathing.
They’re interacting much more naturally.
While my setup isn’t completely free range, giving chickens a large protected area offers many of the same benefits without exposing them to as many dangers. If you’re trying to decide whether giving your flock more room is worthwhile, I found this article about the real advantages of giving chickens more room to roam to be an interesting read.
A Few Things I’d Recommend if You’re Building One
If you’re thinking about building a similar chicken run, here are a few things I’d recommend after finishing mine.
Take your time planning the layout before driving the first post.
Build it bigger than you think you’ll need because chickens always appreciate extra room.
Make it tall enough that you can comfortably walk inside.
Don’t skip covering the top if hawks or climbing predators are common where you live.
Use quality materials the first time instead of trying to save a little money only to rebuild parts later.
Most importantly, build something that fits your own property and the way you manage your flock. Every farm is different, and that’s one of the things I enjoy most about DIY projects.
Frequently Asked Questions
How big should a chicken run be?
The more room you can provide, the better. My run is approximately 10 feet wide and 75 feet long, and I’ve been extremely happy with the amount of space it gives the flock.
Is rebar strong enough to build a chicken run?
For my project, absolutely. Once everything was welded together and connected to the T-posts, the entire frame became very solid.
Why did you cover the top?
Mostly because of hawks. A covered run also helps discourage climbing predators from getting inside.
Why didn’t you use wood?
Steel requires less maintenance over time, won’t rot, and gave me a much stronger framework for a project this size.
Would you recommend building instead of buying?
If you have the tools and enjoy DIY projects, I definitely would. I ended up with a much larger run than anything I could have purchased for a similar price.
What coop did you use?
Instead of building another coop, I connected my existing chicken tractor directly to the side of the run by cutting an opening through the fencing. It gave the chickens easy access to both areas while saving a lot of work.
One Project Down… Now It’s Time to Enjoy It
Now that the project is finished, I can honestly say it was worth every hour I put into it.
The chickens have far more room than they ever did before, I don’t spend nearly as much time worrying about predators, and daily chores are actually easier because I built the run to fit the way I work around our farm.
I’m sure I’ll make little improvements over the years because that’s just how farm projects go. Nothing ever stays exactly the same for long. But if someone asked me today whether I’d build another one this way, my answer would be yes without hesitation.
If you’re thinking about building your own large chicken run, I hope my experience, photos, and video help you avoid a few mistakes and give you the confidence to build something that works for your own property.
Every farm is different, but there’s something incredibly satisfying about watching your chickens enjoy something you built with your own two hands.
About the Author
Daxon Weaver is the owner of Weaver Family Farms, a small first-generation family farm on 4 acres in rural Missouri. Along with his family, he raises backyard chickens, grows fruits and vegetables, operates a
One Project Down… Now It’s Time to Enjoy It
Now that the project is finished, I can honestly say it was worth every hour I put into it.
The chickens have far more room than they ever did before, I don’t spend nearly as much time worrying about predators, and daily chores are actually easier because I built the run to fit the way I work around our farm.
I’m sure I’ll make little improvements over the years because that’s just how farm projects go. Nothing ever stays exactly the same for long. But if someone asked me today whether I’d build another one this way, my answer would be yes without hesitation.
If you’re thinking about building your own large chicken run, I hope my experience, photos, and video help you avoid a few mistakes and give you the confidence to build something that works for your own property.
Every farm is different, but there’s something incredibly satisfying about watching your chickens enjoy something you built with your own two hands.
About the Author
Daxon Weaver is the owner of Weaver Family Farms, a small first-generation family farm on 4 acres in rural Missouri. Along with his family, he raises backyard chickens, grows fruits and vegetables, operates a licensed nursery that ships trees across the United States, and enjoys designing practical DIY farm projects that make everyday life easier.
Daxon shares real-world experiences from projects he’s personally built and tested, from fencing and chicken coops to gardening, orchard work, equipment modifications, and homesteading improvements. Every guide on Weaver Family Farms is based on firsthand experience and written to help other homeowners, gardeners, and small farmers tackle similar projects with confidence.
Daxon shares real-world experiences from projects he’s personally built and tested, from fencing and chicken coops to gardening, orchard work, equipment modifications, and homesteading improvements. Every guide on Weaver Family Farms is based on firsthand experience and written to help other homeowners, gardeners, and small farmers tackle similar projects with confidence.