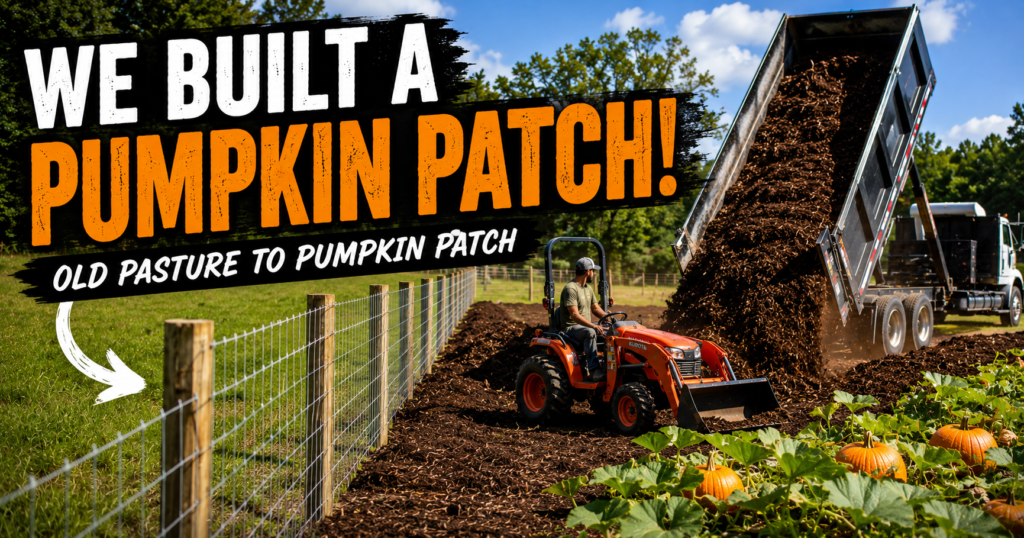
We Finally Committed to Building a Pumpkin Patch
This has been on our list for a while. If you’ve been following along with our YouTube channel, you’ve probably seen bits and pieces of this project coming together over the past few weeks. We’ve been doing a lot of prep work to get a dedicated pumpkin patch set up here on our 4-acre farm in Cairo, Missouri — and we’re finally far enough along that it feels real.
We sectioned off a roughly 100 foot by 40 foot area on the edge of our pasture. That’s a pretty good sized patch — 4,000 square feet of ground that we’re planning to turn into productive growing space over the next couple of seasons. Getting it ready has involved a lot of work: clearing, fencing, getting mulch delivered, and figuring out how to make the whole thing work with the rest of what we’ve got going on around here.
This post is going to walk through everything we’ve done so far — the fencing setup, how we’re using our goats as part of the plan, and why we chose to start with heavy mulching on what is honestly pretty rough clay ground.

Putting Up the Fence First
Before anything else could happen, the fence had to go up. We used standard woven wire livestock fencing — the same type we use elsewhere around the property for our goats. It’s nothing fancy but it’s solid, practical, and it gets the job done. We set the posts and stretched the wire around the full perimeter of the patch area.
One thing that was really important to us when we were planning this out was making sure the goats could still access this space during the off season. We added a gate specifically for that. During growing season, the goats stay out in the rest of the pasture. But once the pumpkins are harvested and the patch is sitting empty through the winter, we can open that gate and let them in.
There’s a real practical reason for that. Goats will trample the ground down and work the soil up a little just from foot traffic. And of course they’ll leave behind natural fertilizer as they go. It’s essentially free soil amendment, and it fits into the way we try to run things here — using what we have, not buying more than we need.
If you’re curious about general farm and homestead tips like this, we write about a lot of that kind of stuff on this site. You can also check out our Ultimate Guide to Backyard Homesteading for a broader look at how we approach small farm life.
The Soil Situation — It’s All Clay
Here’s the honest truth about that section of the pasture: the soil isn’t good. It’s heavy clay. You can tell because even weeds have a hard time taking over out there — they grow, but they’re scraggly and shallow-rooted. Clay soil drains poorly, compacts easily, and doesn’t give roots much room to work.
That’s not the end of the world for a pumpkin patch, but it does mean we’ve got to put some serious work in before we can expect good results. You can’t just stick seeds in clay and hope for the best, especially with something like pumpkins that want to spread out and really establish themselves.
Our plan is to build the soil up over time rather than try to fix it all at once. That starts with mulch.
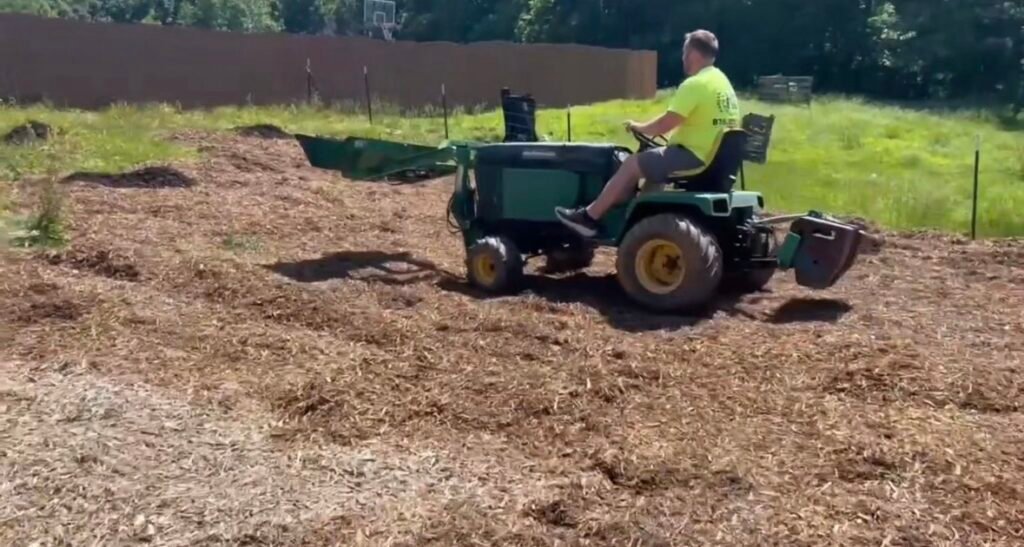
First Dump Truck Load of Mulch
We had our first dump truck load of mulch delivered and spread inside the patch. Getting it spread out was a job in itself — we worked through that whole load and got it distributed across the area pretty well. It’s a good start, but when you’re covering 4,000 square feet, one load doesn’t go as far as you’d like.
Wind and rain will help move things around and settle it in, but realistically we know we’re looking at two more dump truck loads before we’d call the mulching phase complete. Three loads total is what we’re planning for. That gives us the depth we want and makes sure we’ve got enough organic material working its way into that clay over time.
The goal here isn’t really about this first growing season — it’s about the long game. As that mulch breaks down year after year, it’s going to improve the soil structure, add organic matter, and help with moisture retention during the dry Missouri summers. That’s the kind of investment in the land that pays off for years, not just once.
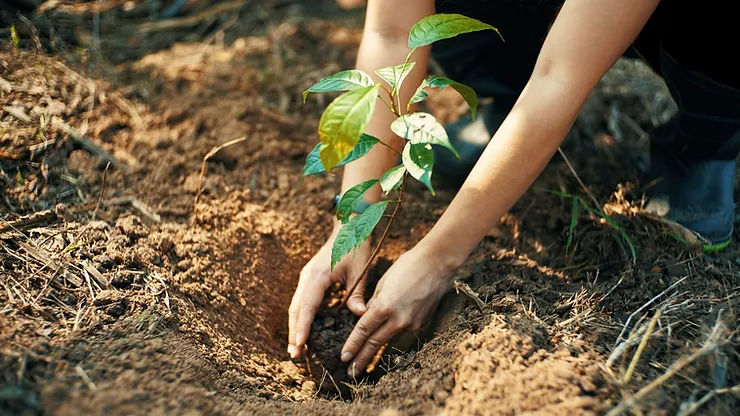
We’ve written before about the benefits of good planting practices and soil prep — and the same principles apply whether you’re planting trees or starting a garden patch. Good soil is everything.


Why Mulch Instead of Tilling?
We get this question sometimes. Why not just till the clay up and work compost into it instead of piling mulch on top?
Tilling clay can actually make things worse before they get better. When you till heavy clay and then it gets wet and dries again, it can harden up even more and create a compacted layer that roots struggle to push through. Mulching on top and letting it break down naturally is a slower process but it’s a gentler one. The soil biology has time to adjust, earthworms move in, and things improve from the ground up instead of being forced.
We’re also going to be building up planting hills from compost when it comes time to actually put seeds in the ground. That keeps the roots starting in good material while the deeper soil amendment continues to happen slowly underneath. It’s not the fastest approach, but on a small farm like ours we’re thinking in seasons and years, not just weeks.
Using the Goats the Right Way
We talk a lot around here about making every part of the farm work together, and the goat integration in this patch is a good example of that. A lot of people think of animals and gardens as being in conflict — you keep animals away from the garden and that’s that. But on a homestead, you can set things up so your animals are actually doing useful work for you in a rotation.
The goats aren’t allowed in during the growing season, obviously. But once harvest is done, they go in and do a few things that are genuinely helpful: they eat up any remaining plant debris, they trample the ground and break up the surface a little, and they add nitrogen-rich manure to the soil. Then we close the gate again in spring before we start planting.
It’s a simple rotation but it’s effective. And it means the goats are contributing to the garden even when the garden isn’t producing.
We’ve covered chickens in a similar context too — if you’re curious about how poultry can fit into a homestead setup, take a look at our post on whether chickens can boost your homestead’s sustainability. A lot of the same ideas apply.
What’s Coming Next for the Pumpkin Patch
We’re not done by a long shot. The fencing is up, the first mulch load is in, and now we’re moving into the next phase. More mulch deliveries are on the way. Then we’ll be building up our planting hills using compost — we’ll do a full post and video on that process as well. After that, pumpkin seeds go in, and then watermelon will be next.
We’re going to document all of it as we go. This whole thing is a new venture for us and we want to be honest about what works and what doesn’t. If you’re thinking about starting your own pumpkin patch or just want to follow along with what we’re doing, subscribe to our YouTube channel so you catch every update.
And if you’re looking for trees or plants to add to your property while you’re working on your own growing projects, check out Weaver Family Farms Nursery — that’s our tree and plant operation where we sell a variety of things that do well here in the Midwest. We also do custom wood engravings and signs if you ever want something handmade for your home or farm. And if you’ve been thinking about adding a puppy to the family, you can see our available pups over at Weaver Family Farms Puppies.
More updates coming soon. Thanks for following along with us out here.